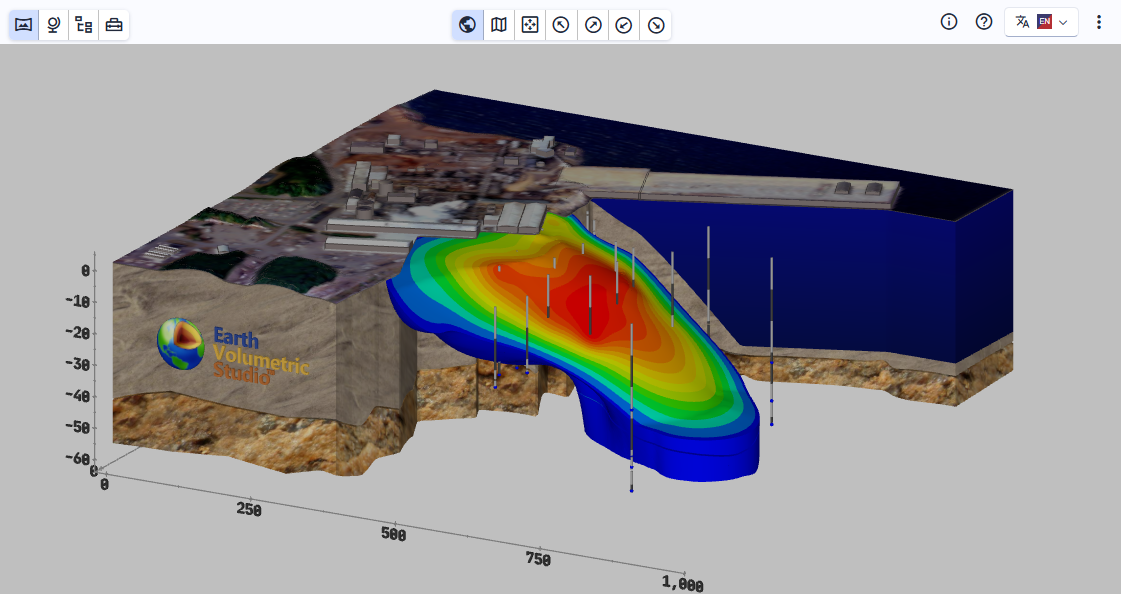
The C Tech Web Scene Viewer is 3D, interactive software for viewing and working with C Tech Web Scene (CTWS) files created by EVS. It allows users to manipulate the view and content of 3D models quickly in a straightforward manner.
There are two versions of the Viewer:
Web Based
Our web based viewer can be accessed in several ways:
Our EVS software customers may have their own branded viewer. Ask the organization (creator) who provides you with CTWS files.
Our EVS software customers may also have the ability to embed C Tech Web Scenes directly into their website. This eliminates your needing to receive the .CTWS files. Instead you only need the URL to a specific file such as: Tunnel Model
Allows opening CTWS locally on the computer without internet access
Browser Compatibility
The C Tech Web Scene Viewer works with most browsers to maximize its interoperability. However, we test the viewer with the most popular browsers and therefore we recommend the following. Note, if your browser is not up to date, it may be a problem:
Chrome
Edge
Safari (more limited testing)
Devices
Windows Computers: The viewing of C Tech web scenes is most thoroughly tested on windows computers and therefore these will offer the greatest functionality. Certain features such as keyboard shortcuts may only be fully functional on Windows computers with a keyboard and numpad.
Mac Computers should work well, especially if Chrome is used since this is our primary browser for development and feature testing.
Tablets and Smartphones: Both Apple and Android phones are tested and new phones provide excellent performance. Keyboard shortcuts will be lacking, but most features are still accessible.
Interactive tools including Measure, Probe, and Select for working with 3D scene objects
Subsections of C Tech Scene Viewer Help
Open a C Tech Web Scene (CTWS File)
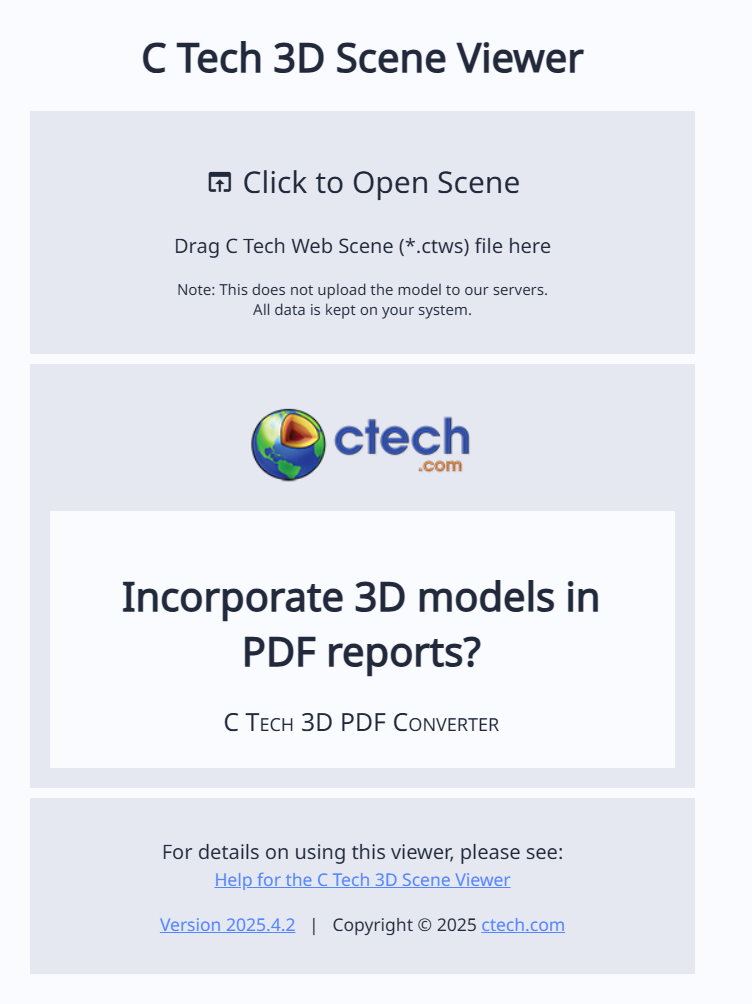
To open and work with a CTWS file, either double click on the file (if using Windows 10 or 11 standalone application), or visit https://viewer.ctech.com. On the web version, you can open a file by dragging the CTWS file into the web page, or clicking on the “Click to Open Scene” portion of the site to browse to your CTWS file:
Viewer Interaction with the Mouse
Once opened, the mouse can be used to interact with the resulting model. You can rotate using the left mouse button, pan using the right mouse button, and zoom using the mouse wheel or middle mouse button.
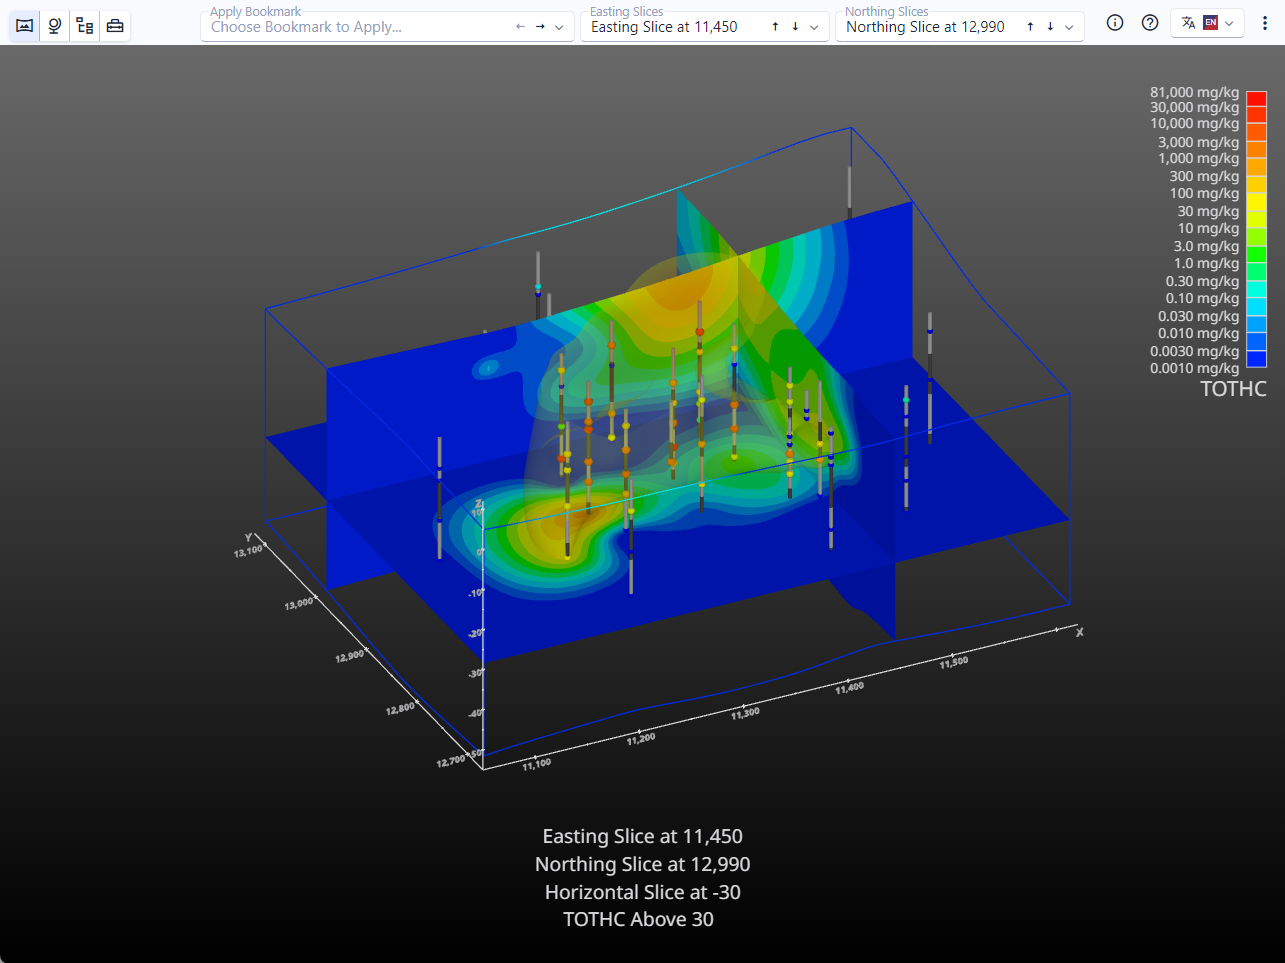
Once a CTWS file has been opened, there is a toolbar across the top of the window. It provides access to other functionality and the ability to manipulate the model contents and view.
The content contained within the toolbar will vary based on the CTWS file.
The leftmost portion of the toolbar contains four buttons, each of which controls the left panel. The selected button determines the panel being used, which can be any of the four following:
Full Width Viewer: No panel is displayed, allowing the viewer to use the entire window width
View Scene Properties: Show the properties that apply to the entire scene
View Model Tree: Allow manipulation of each individual model within the scene
View Tools: Work with the interactive tools in the viewer
The center portion of the toolbar contains the controls to work with the current favorites for this CTWS. This can include any of the following:
Set Views
Bookmarks
Sequences
The right portion has 4 editors, allowing you to view:
Scene Information. Clicking on the “i” icon will show the scene information screen.
Show Help.
Choose language. By default, the viewer defaults to your local language settings on your browser, falling back to English if there isn’t a better option. You can force a specific supported language here.
Overflow menu (Vertical dotted line). Includes any favorite controls that won’t fit on the toolbar, as well as options to:
Display full screen. Clicking will make the viewer’s portion of the browser Full Screen. Hit Escape to return to normal operation.
Open new scene: Browse to a new CTWS file
Options: Open the options screen, which allows you to adjust some settings that persist on your system, including:
Theme: Choose from any of the 4 themes for the user interface. Light and dark variations are available.
Transition Duration: Adjust how quickly transitions in views occur, such as switching between bookmarks. 100% uses our default transition speed. Lower values will make rotations happen more quickly, and larger values will slow things down. The default of 100% uses timings from one to three seconds for various transition effects.
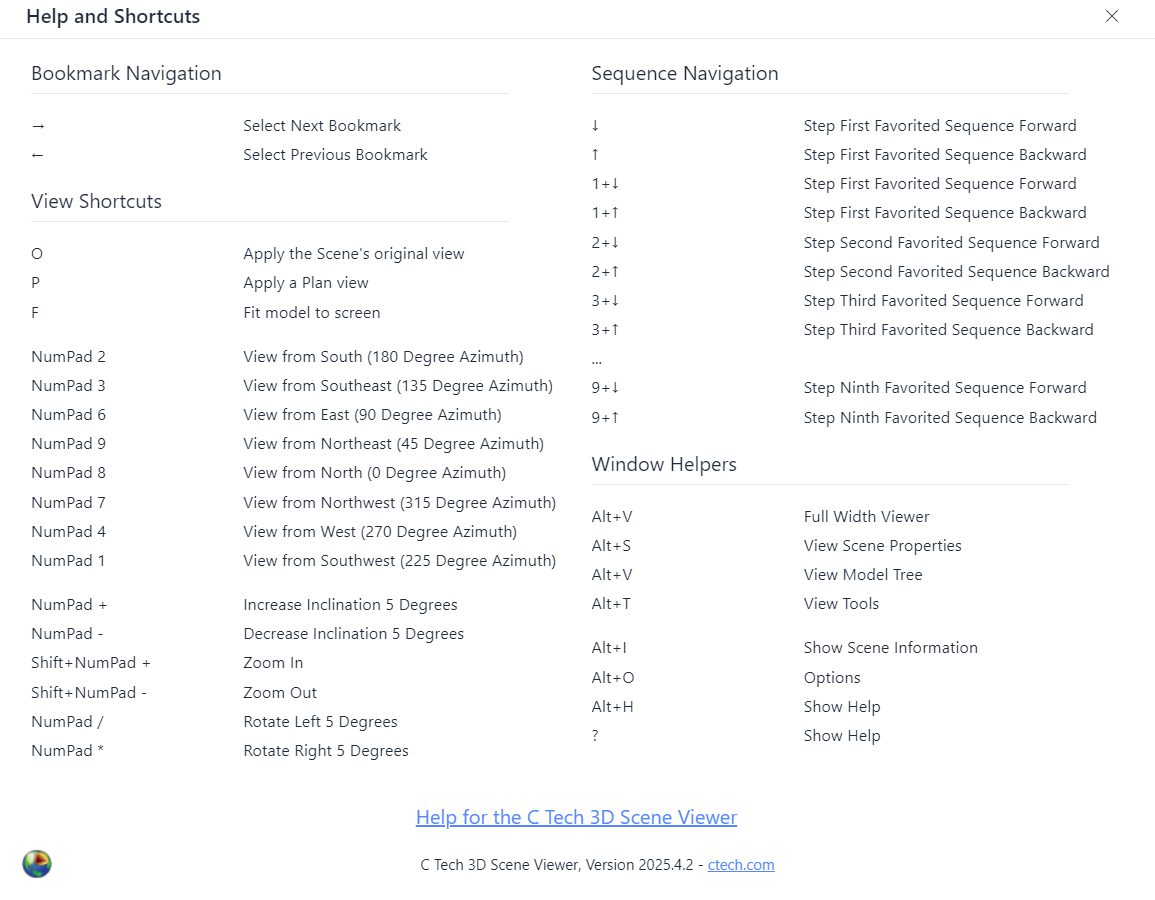
Keyboard Shortcuts
Pressing the Question Mark (?) anywhere in the Viewer window will bring up the list of available keyboard shortcuts:
These allow you to perform many operations without the mouse, including rotation and zooming (via the keypad), as well as controlling bookmarks and sequences when favorited.
Info
There are multiple options for Sequence Navigation. When more than one favorited sequence is visible, you can hold down a number and use the up or down arrows to control individual sequences. For example, if you have two slice sequences, and both are favorited and visible, holding down 1 and pressing down will step the first slice forward, and holding down 2 and pressing down will step the second slice forward one state.
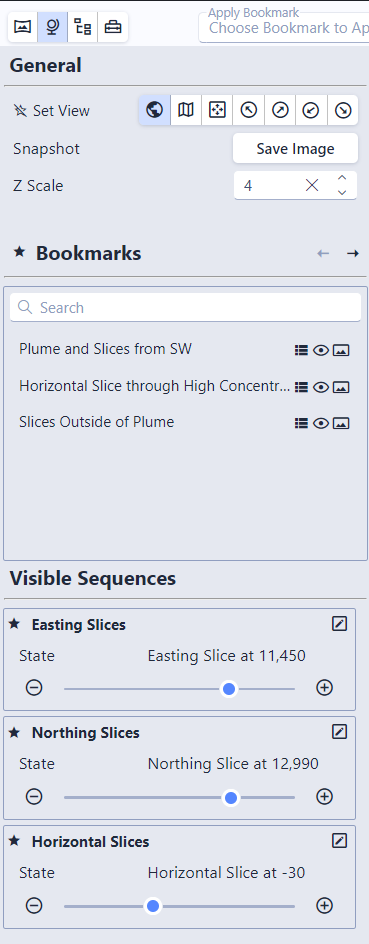
The Scene Properties panel appears when View Scene Properties is selected in the left portion of the toolbar. It contains up to three sections, depending on the content of the CTWS file:
General
The general section of the Scene properties has three controls. These include:
Set Views
This allows you to choose any of the Set Views. Note the small star icon next to this control. This allows you to “favorite” the Set Views, which will include them in the toolbar for use when the panel is closed.
These buttons allow you to quickly move the viewer to a predetermined view, which includes the following options:
Scene’s Original View: Move the viewer to the original view the CTWS creator used
Plan View: Move to a top down, plan view of your scene
Fit to Screen: Preserve the current view orientation, but zoom so the model fits to the full size of the viewer window
View from SE/SW/NE/NW: View the model from these four predetermined directions
Snapshot
The second control is the “Snapshot” button. This allows you to save an image of the viewer contents as a .PNG file.
Z Scale
Adjust the vertical exaggeration (Z Scale) to be applied to the entire model. This will inherit the setting in EVS when the CTWS is first opened.
Info
Model items that would retain normal shape and aspect such as text and spheres used as glyphs will be distorted if a Z Scale other than that used when the CTWS was saved.
Bookmarks
Bookmarks are an optional feature created by the author of the CTWS file. If they exist, the Bookmarks section will show in the Scene Properties.
Bookmarks provide a way to control one or more of the following:
View: Azimuth, inclination, roll, scale and center of the view.
Object settings such as Visibility and Opacity of all objects in the Model Tree
The state of all Sequences
Each bookmark includes a small icon showing which of the above is controlled by that specific bookmark. They will be disabled when the bookmark does not impact that feature:
Clicking on a bookmark will apply it and change your view. The left and right arrows can be used to step through bookmarks. In addition, the small star allows bookmarks to be added to the favorites in the toolbar.
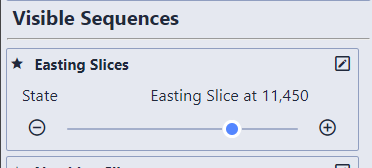
Visible Sequences
Sequences are special model types which allow content to change in the scene. Each sequence contains multiple “states”. This can include options such as slice positions (where each state will move a slice to a new location), plume levels (each state will change the threshold level for an analytical plume), which analyte is being displayed, what model revision is shown, or more. The capabilities are endless, and up to the author of the CTWS file.
Any sequences which are currently visible (which can be controlled via bookmarks or the model tree) will be listed in the Scene Properties. Each sequence state can be changed here. In addition, individual sequences can be favorited via the small star next to the sequence.
Controlling the states in sequences marked as favorite via the keyboard is done with simultaneously pressing the number keys on the primary keyboard (not the numpad) and the up and down arrow keys. See the keyboard shortcuts.
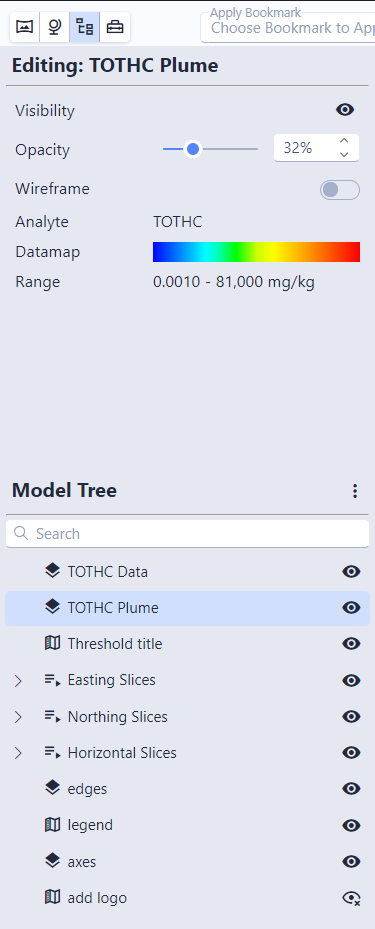
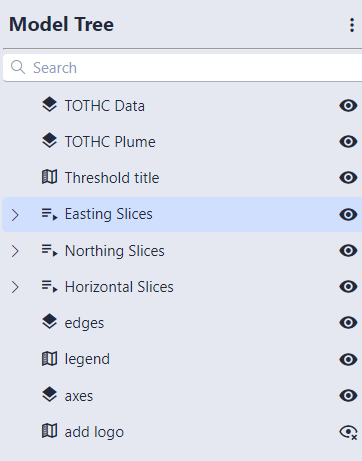
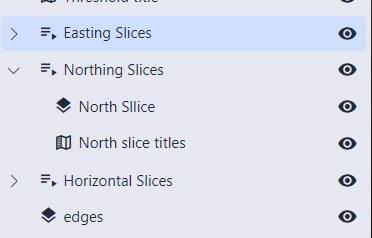
The Model Tree panel appears when View Model Tree is selected in the left portion of the toolbar. It contains two sections:
Editing
The Edit panel shows the properties of the currently selected model in the Model Tree below. Different model types include differing controls for editing. These typically include the ability to view or change settings for a specific model, including a mix of the following:
Visibility
Opacity
Wireframe
Analyte being displayed
Lithology information
Datamap and data range
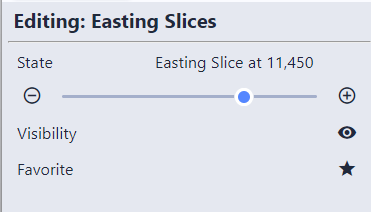
Sequence state
Favorite or unfavorite the sequence
The exact data displayed varies depending on the type of object chosen. Choosing a sequence, for example, allows the current state of that model to be changed:
Model Tree
The bottom half of the panel is the Model Tree. This is the entire set of models used in the scene:
The three dots to the right allow you to immediately mark all models as visible or hidden, as well as to expand or collapse the tree.
Clicking on a model within the tree will edit its properties. Groups and sequences can be expanded, allowing you to change individual models contained within:
The eye icons on the right allow you to see and immediately change the visibility of individual models. Groups and sequences toggle the visibility of all of their children when clicked.
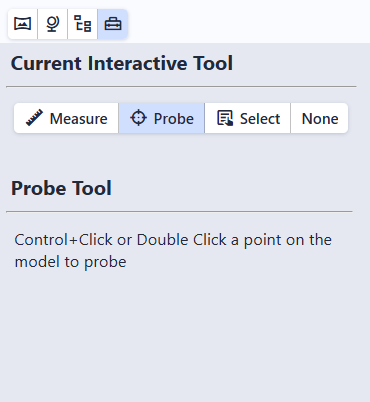
The Tools panel appears when View Tools is selected in the left portion of the toolbar:
The Current Interactive Tool allows you to control what happens when you double click or use Control+Left Click on an object in the scene.
There are four options for tools:
Measure: Double click on two points, and provide a tool to measure distance, slope, aspect, and more
Probe: Get detailed information about an object by double clicking on it
Select: Double click on an object to open the Model Tree and automatically select the object for editing
None: Disable all interaction via double click or control + click
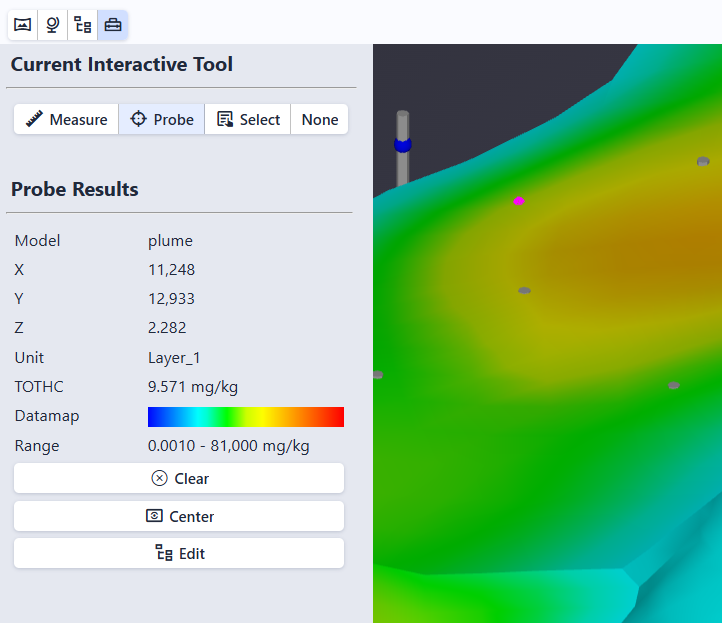
By default, double clicking on an object performs a Probe:
The Probe is displayed in the scene as a wireframe, fuchsia colored sphere.
Information about the model at that location is displayed in the Tools panel in the Probe Results section. This will include various information based on which model was probed, but can include the coordinate, unit, analyte and value at that location, data mapping, and data range.
In addition, three buttons are displayed:
Clear: Clears the probe and removes the results from the Tools window
Center: Recenters the view on the picked location. Mouse rotations will then rotate about that point instead of the center of the scene.
Edit: Opens the Model Tree and selects the picked model in the tree and editor automatically.