Introduction to Python Scripting
Python scripting in Earth Volumetric Studio provides a method to programmatically control and automate virtually every aspect of the application. By leveraging the Python programming language, you can move beyond manual interaction to create dynamic, data-driven workflows, automate repetitive tasks, and perform custom analyses that are not possible with standard interface controls alone.
This topic provides a high-level overview of what Python scripting is, why it is useful, and what it can achieve.
Accessing Python Scripting Features
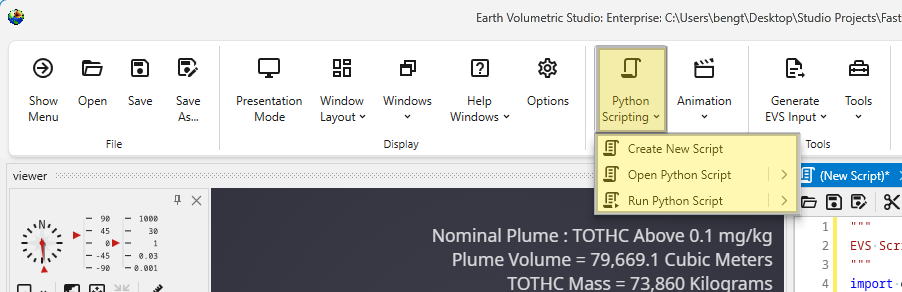
The main entry point for all scripting functionality is the Python Scripting button in the main toolbar.

This dropdown menu provides options to create, open, and run scripts, which are managed in the dedicated Python Window.
Why Use Python Scripting?
While the graphical interface is ideal for building and exploring applications, scripting excels at tasks that require logic, repetition, and automation. It allows you to codify your workflow, making it precise, repeatable, and easy to share.
The primary benefits of scripting include:
- Automation: Automate repetitive tasks, such as generating reports or exporting images for a series of different datasets or parameters.
- Custom Logic: Implement complex conditional logic and loops that are not possible with other features.
- Data Integration: Read data from external sources (like CSV files, databases, or web APIs) and use it to dynamically control your EVS application.
- Advanced Analysis: Use popular Python libraries like NumPy and Pandas to perform sophisticated data analysis and feed the results back into EVS modules.
Python Scripting vs. Sequences
Both Python scripts and Sequences can be used to create dynamic applications, but they serve different purposes.
| Feature | Sequences | Python Scripting |
|---|---|---|
| Nature | A finite collection of predefined, static states. | A program that can execute logic, loops, and calculations dynamically. |
| Use Case | Ideal for presentations and guided exploration through a set series of steps (e.g., a slider for plume levels). | Ideal for automation, custom analysis, and workflows that require conditional logic or external data. |
| Flexibility | Limited to the states that were explicitly saved by the creator. | Nearly limitless. Can respond to data, create or destroy modules, and change application structure on the fly. |
In short, use sequences when you want to present a curated set of options to a user. Use Python scripting when you need to automate a process or perform actions that are data-dependent and cannot be predefined.
Common Use Cases and Examples
Python scripting opens up a vast range of possibilities. Here are a few common examples of what you can achieve.
Batch Processing and Report Generation
Imagine you have 50 different data files that all require the same analysis. A Python script can automate this entire workflow:
- Loop through a directory of input files.
- For each file, update the file path in a module.
- Execute the application.
- Export a screenshot of the final viewer with a unique name.
- Read a result from the
volumetricsmodule and write it to a summary CSV file.
Parametric Studies
A script can be used to investigate how changing a key model parameter affects the results. For example, you could write a script to:
- Loop through a range of values for the
3d estimationmodule’s Reach parameter (e.g., from 500 to 5000 in steps of 100). - For each value, execute the application and log the resulting plume volume.
- This allows you to systematically assess the sensitivity of your model to that parameter.
Dynamic Application Control
Scripts can modify the application in response to data. For example, a script could:
- Read a text file containing a list of coordinates.
- For each coordinate, move the
slicemodule to that location. - If a certain condition is met (e.g., the average concentration on the slice exceeds a threshold), the script could automatically log these locations to the Output Log.
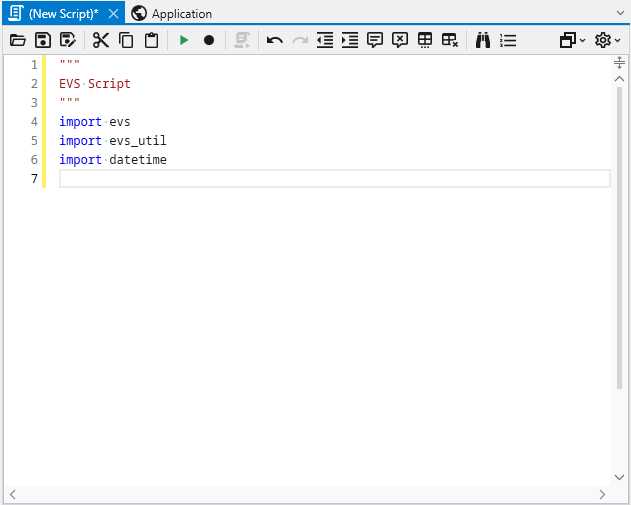
The Python Script Editor is the integrated environment within Earth Volumetric Studio for writing, editing, and running Python scripts. It provides a full-featured text editor with syntax highlighting, code formatting tools, and direct access to execution and debugging functions, making it the central hub for all your scripting activities. Accessing the Python Script Editor You can open the editor through the Python Scripting button located in the Main Toolbar.
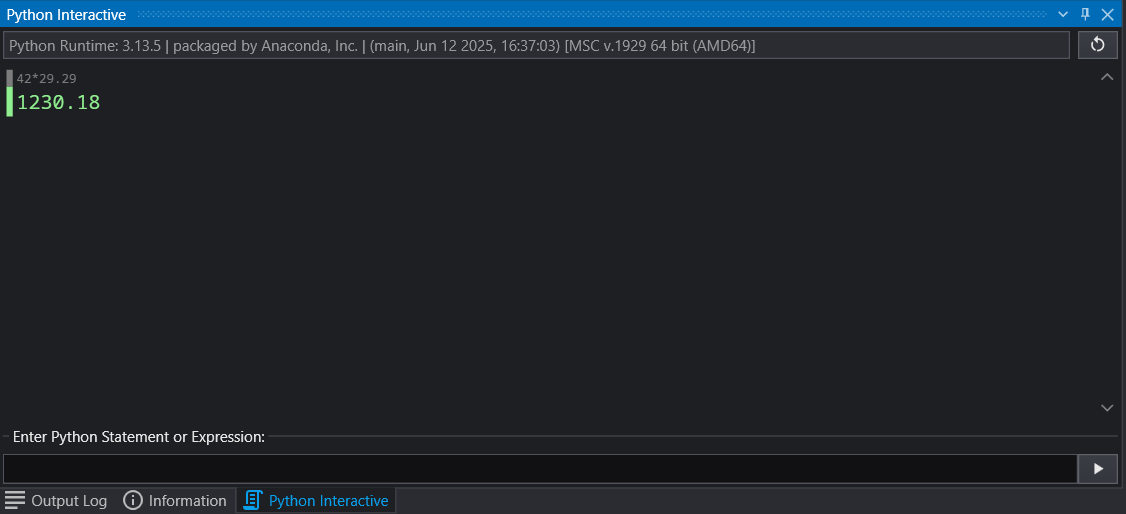
The Python Interactive window provides a real-time environment to execute Python statements and expressions. This tool allows you to test code sni
Accessing Properties Using Python
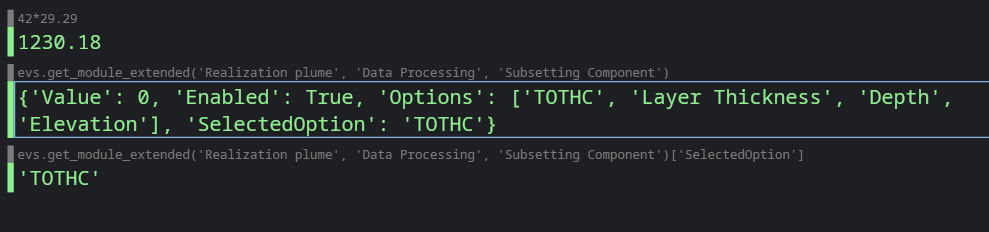
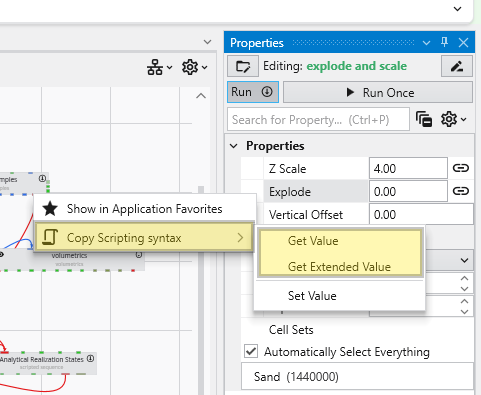
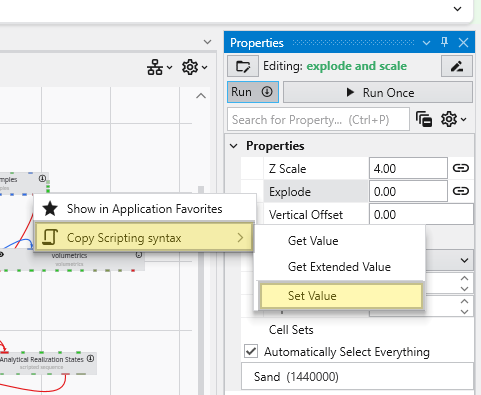
You can programmatically read and set the properties of any module using Python Scripting. This is a powerful feature for automating workflows and creating complex interactions between modules. The scripting engine provides programmatic access to the same underlying properties that are exposed as controls in the Properties window. This allows scripts to read, evaluate, and update values, mirroring manual user interaction. The easiest way to script a property is to copy the required syntax directly from the Properties window.
Python Functions & Operators Earth Volumetric Studio supports Python 3.12 and 3.13. It will use the highest supported system installed version by default, but can be configured in options. A listing of Python Functions & Operators can be found at python.org. Below are links to relevant pages: Functions Math Operators String Operators Date and Time Operators