Earth Volumetric Studio features a flexible interface composed of several windows. You can customize their size, position, and docking state to create a layout that suits your workflow.
Customizing Your Workspace with Window Layouts
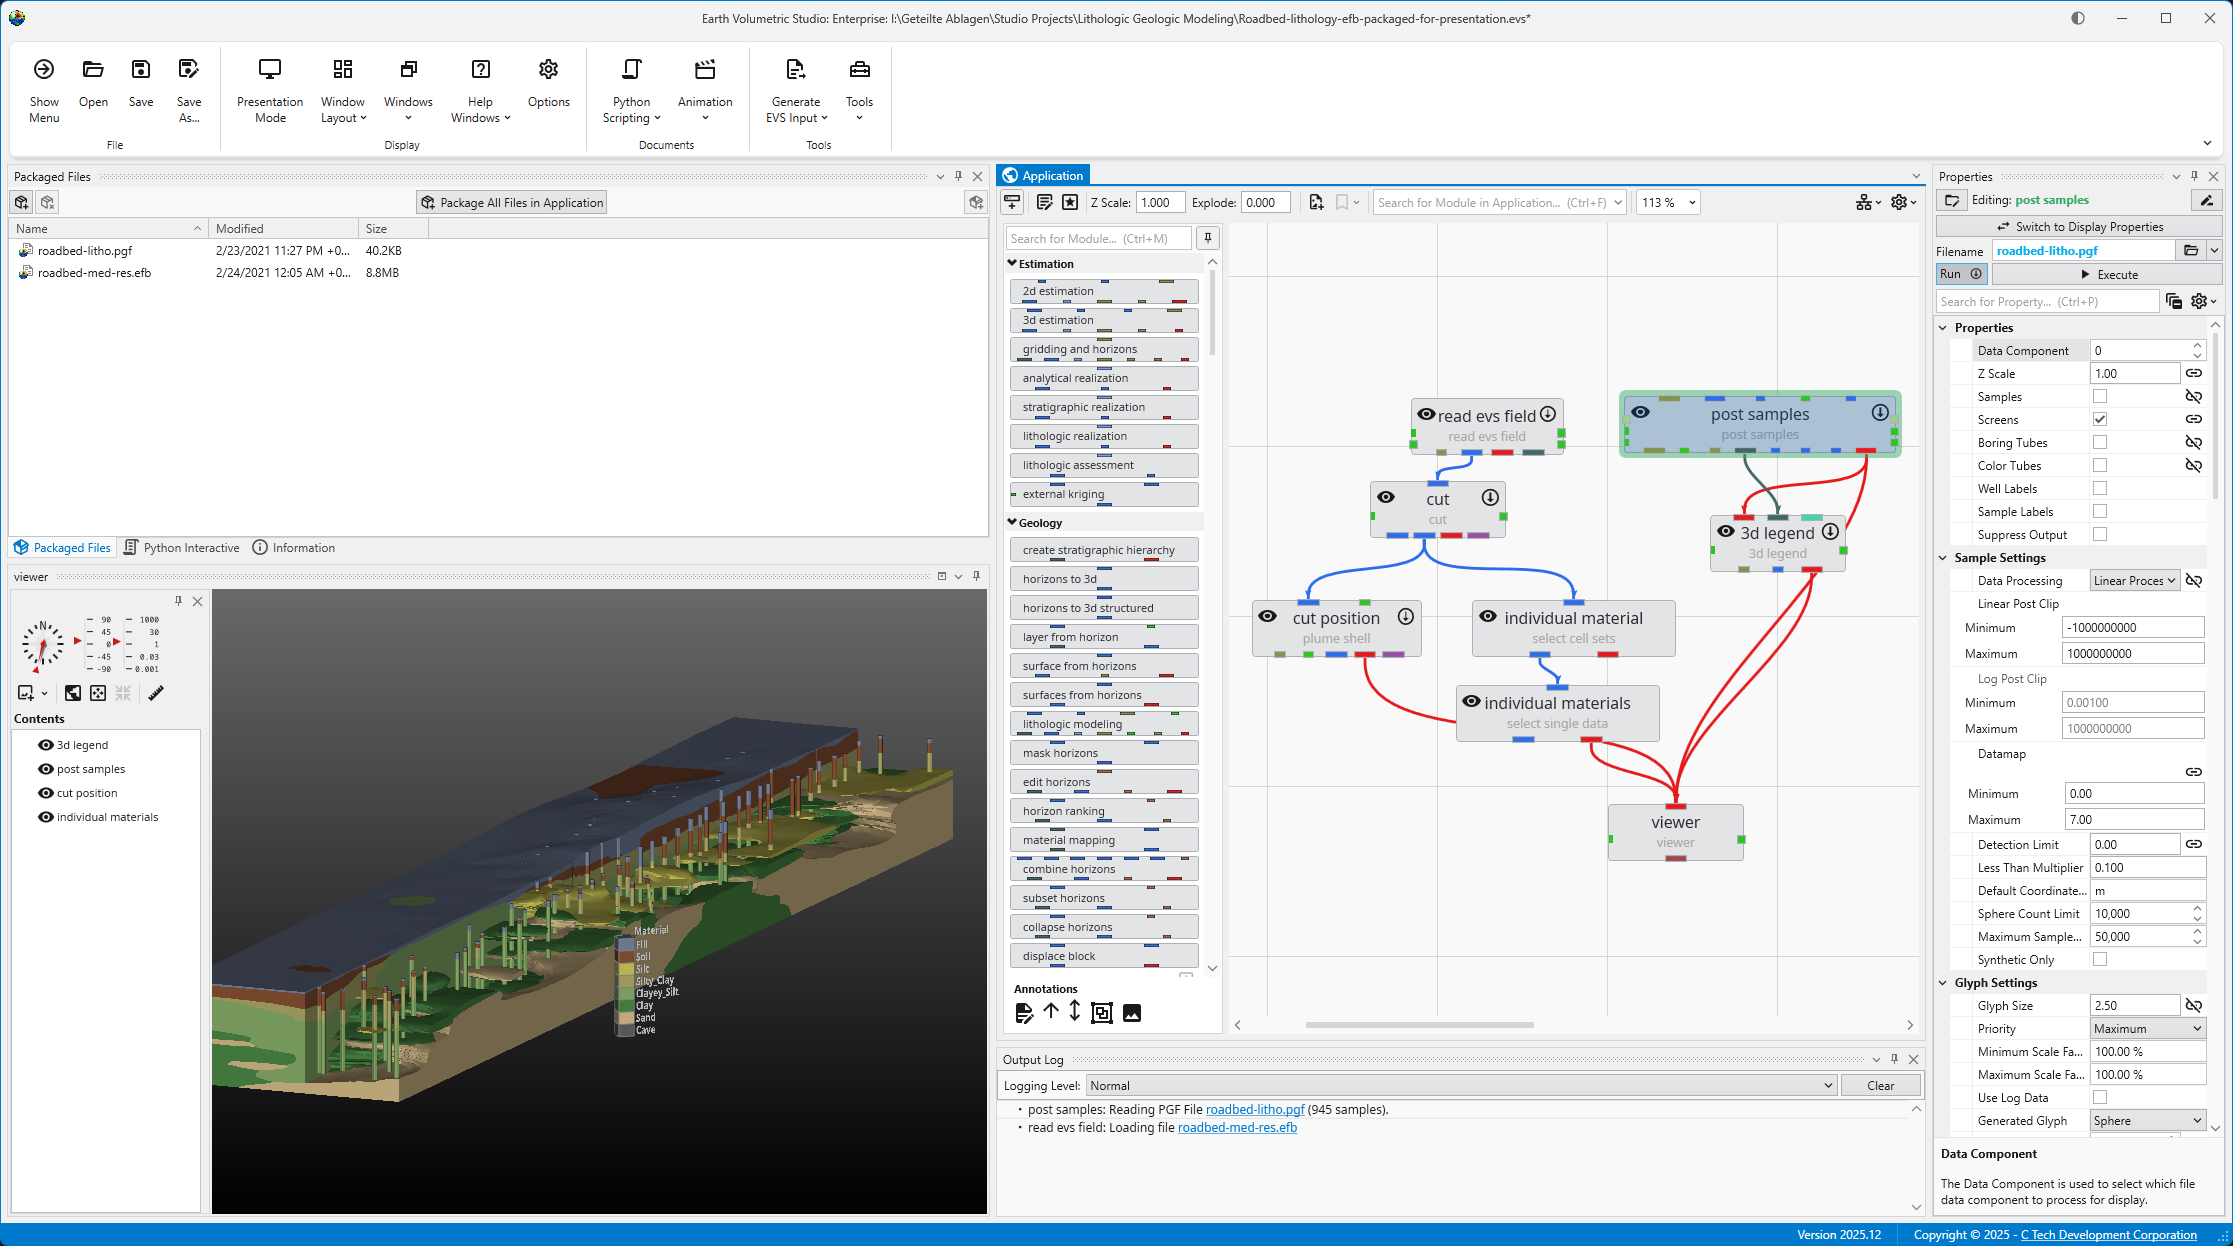
EVS provides a flexible windowing system that allows you to customize the layout of your workspace. You can control the position, size, grouping, and visibility of most windows to suit your workflow. These customized layouts can be saved and reloaded, which is useful for different tasks or screen resolutions.
For example, here is an application with a personalized window layout:
Window Visibility and Docking
You can manage window visibility and docking using the controls located on each window’s title bar. While most windows can be moved, resized, or closed, there are a couple of exceptions:
- Application Window: The main area for adding and connecting modules is always part of the main EVS application window, except in EVS Presentations or when working in Presentation mode.
- Viewer Window: The Viewer cannot be closed, but it can be undocked and moved to another monitor for a multi-screen setup.
Example: Optimizing for a Larger Viewer
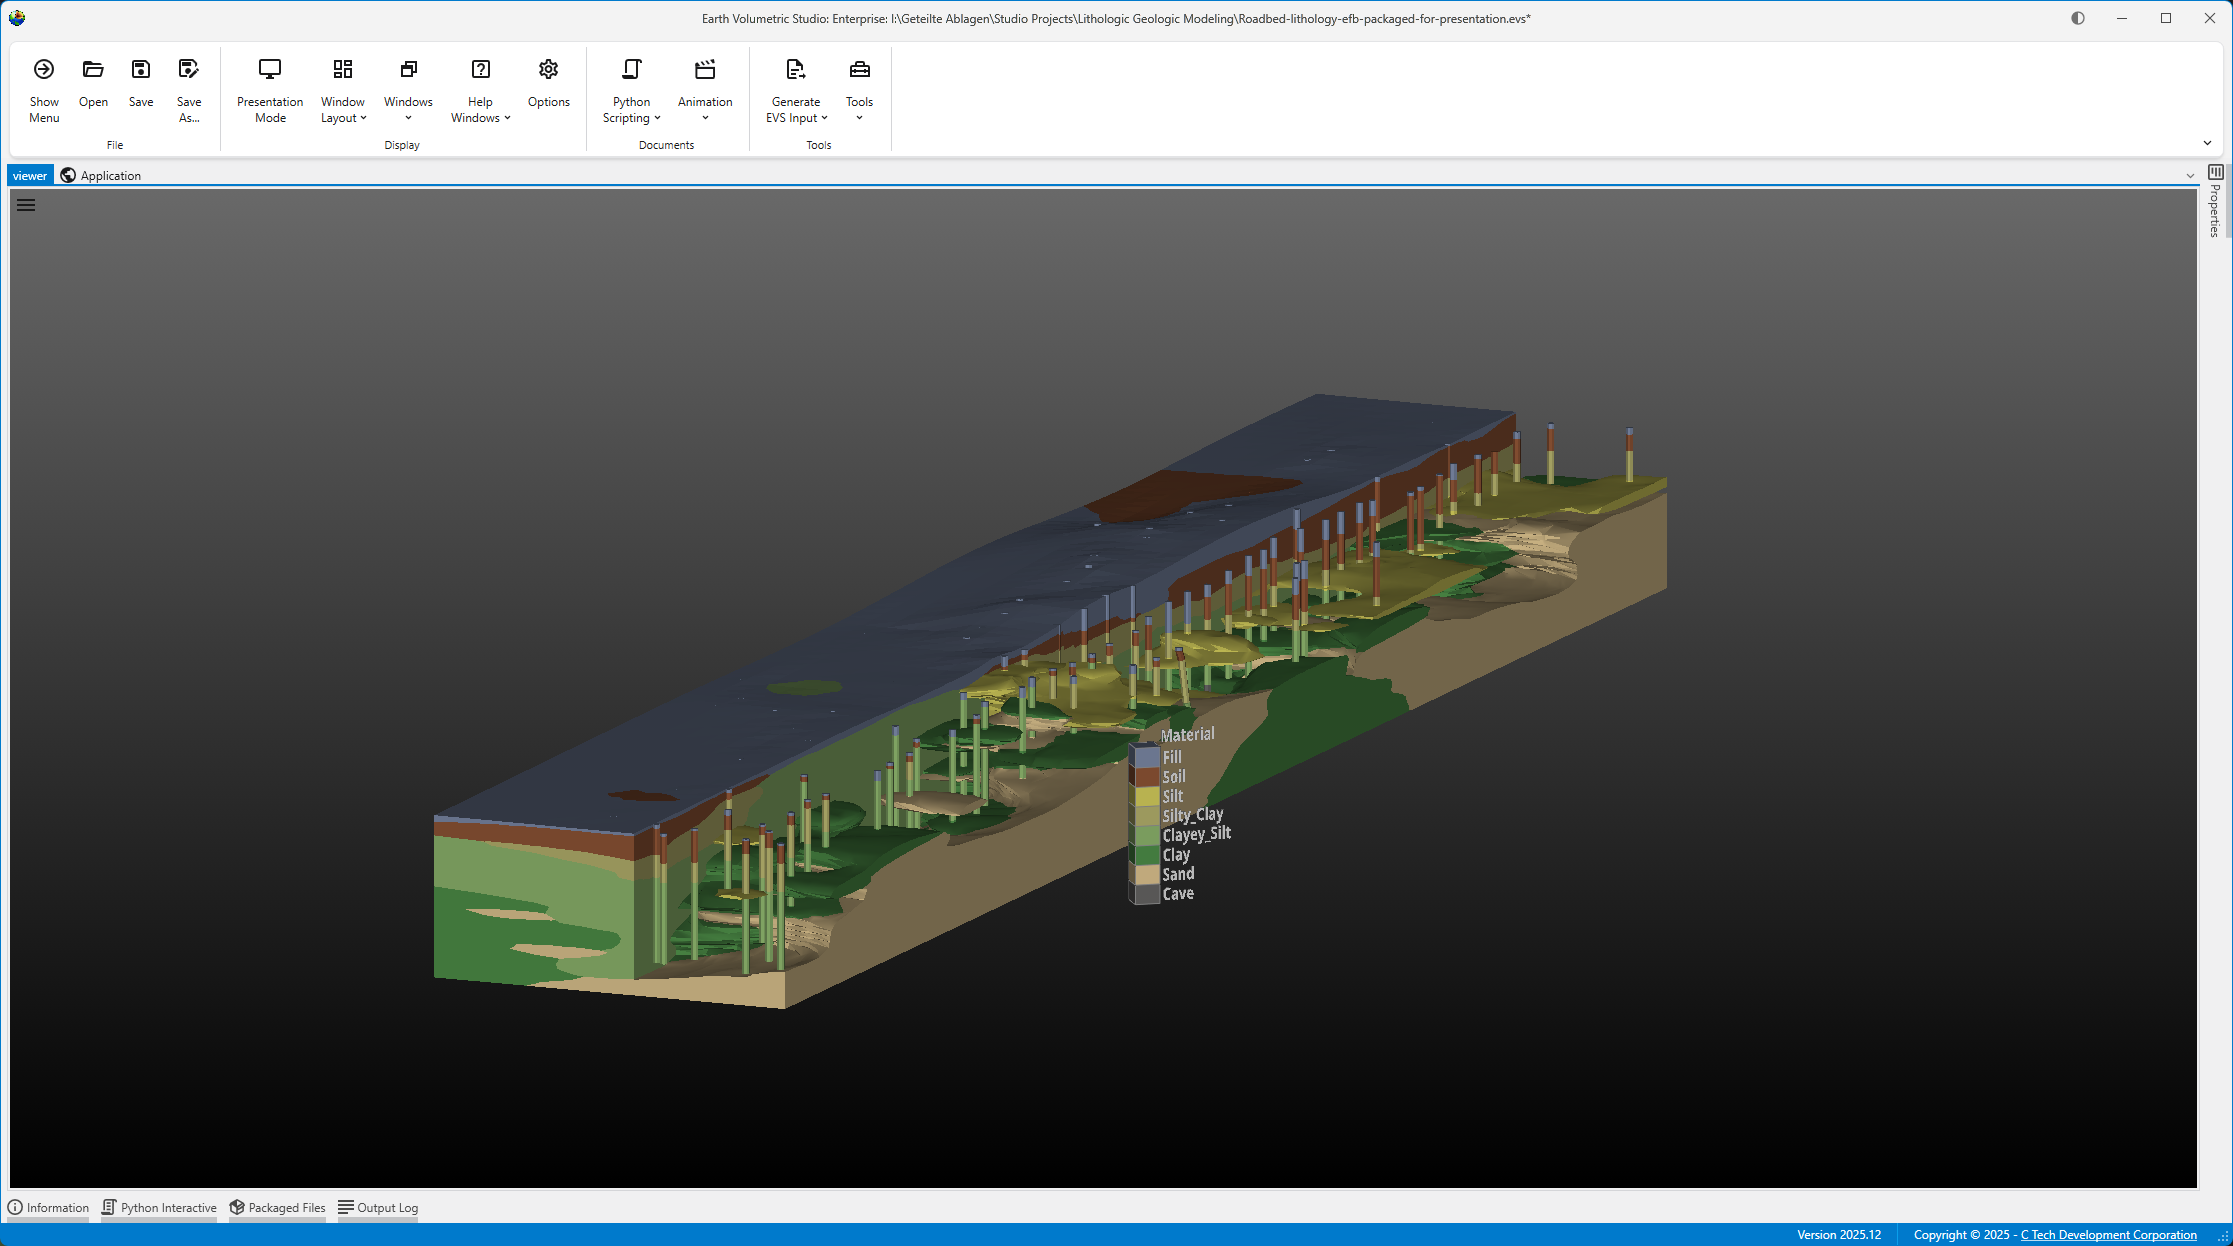
You can create different layouts to optimize your workspace. For instance, the layout below is configured to maximize the Viewer’s screen space. Notice how windows are tabbed together to save space:
- The Application and Viewer windows are tabbed, with the Viewer active.
- The Information, Packaged Files, and Output Log windows are tabbed, with the Output Log active.
Saving a Custom Window Layout
Once you have arranged the windows to your liking, you can save the layout for future use.
- Click the Options button in the Main Toolbar.
- In the Options window, expand the Window Layouts section.
- Here you have the option to create a new layout or overwrite the currently active layout.
- Create a new layout: Click the + (Add) button to save your current window arrangement as a new layout. It will appear in the list along with any previously saved layouts and the “Default” configuration.
- Overwrite the current layout: Click the Overwrite Current Layout button.

Loading or reverting a Custom Window Layout
There are two ways to switch to a different layout.
The Options window
You can load a previous or revert a layout in the same section as described above.
- Click the Options button in the Main Toolbar.
- In the Options window, expand the Window Layouts section.
- Here you have the option to load a layout or revert to the “Default” layout.
- Load a layout: Select the desired layout and click the Apply Selected Layout button or alternatively revert to the “Default” layout using the Revert to Default button.
- Revert to default: Click the Revert to Default button to revert the current layout to the one saved as “Default”.

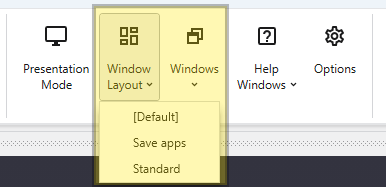
The Quick Access Button
You can easily switch between your saved layouts directly from the Main Toolbar.
- Click the dropdown arrow next to the Window Layouts button in the Main Toolbar.
- Select your desired layout from the list to apply it instantly.