EVS Presentations (.EVSP) provide a single file deliverable which allows our customers to provide versions of their Earth Volumetric Studio (EVS) applications to their clients, who can then modify properties interactively.
For example, an EVS Presentation can allow your clients to:
Choose their own plume levels
Change Z-Scale and/or Explode distance
Move slices or cuts through the model
Draw their own paths for (cross section) cross-sections
This works by creating a restricted version of an EVS application, saved as an EVS Presentation (.evsp file).
The file will have all of its data stored as packaged files, always work in Presentation Mode, and prevents the application from being modified. In addition, only the Application Favorite properties can be modified, so the author of the Presentation needs to determine which properties are critical for the Application to modify in advance.
This functionality results in a single file deliverable which can allow unlimited changes to critical application properties, and is usable without and EVS license by your clients.
The development of EVS Presentations (EVSP) from EVS Applications will nearly always require modification to your EVS application. The key steps are:
Save your application (ideally under a new name, as you will be modifying it for the process of making an EVSP). Replace Disallowed Moduleswith acceptable replacements, if applicable. See Disallowed Modules and Replacements for specifics on which modules need to be replaced. Note: Not all Disallowed Modules have replacements which can be included in EVS Presentations. For example, many 3d exporters must just be removed altogether. Modules which create a model (gridding and horizons, 3d estimation, etc) must be removed. This is done by saving an EF2 file (using write evs field) of their output, and then using that EF2 file in read evs field as a replacement of the network portion doing the model creation. Packageall data files referenced in any modules. There cannot be any externally referenced data files. Some modules cannot be packaged and are automatically replaced by the packaging process. These include: import vector gis import cad import wavefront obj Best if you don’t do this step sooner. See Packaged Files and Packaging Data Into Your Applications for details on the process. Add all desired module properties to Application Favorites, so they can be accessed once the application is saved as an EVS Presentation. EVS Presentation files do not allow access to module properties unless they are added to the Application Favorites. Backup your application as an EVS application to serve as an editable backup. This is essential, should you wish to add additional module properties later. Convert the application to an EVS Presentation (.evsp file). This is not a reversible process, which is why you want the backup from step 5. Convert To Presentation The option to convert your current application to an .EVSP file is not a reversable process. To access this, choose Show Menu in the Main Toolbar:
Subsections of EVS Presentations
C Tech’s EVS Presentations (EVSP) are single-file deliverables that allow you to share interactive versions of your Earth Volumetric Studio (EVS) applications. Your clients can use these presentations to modify properties and explore the model without needing a full EVS license.
For example, an EVS Presentation can allow your clients to:
Choose their own plume levels
Change Z-Scale and/or Explode distance
Move slices or cuts through the model
Draw their own paths for cross-sections
While the content of each EVSP will vary, this guide covers the fundamental features common to all EVS Presentation applications.
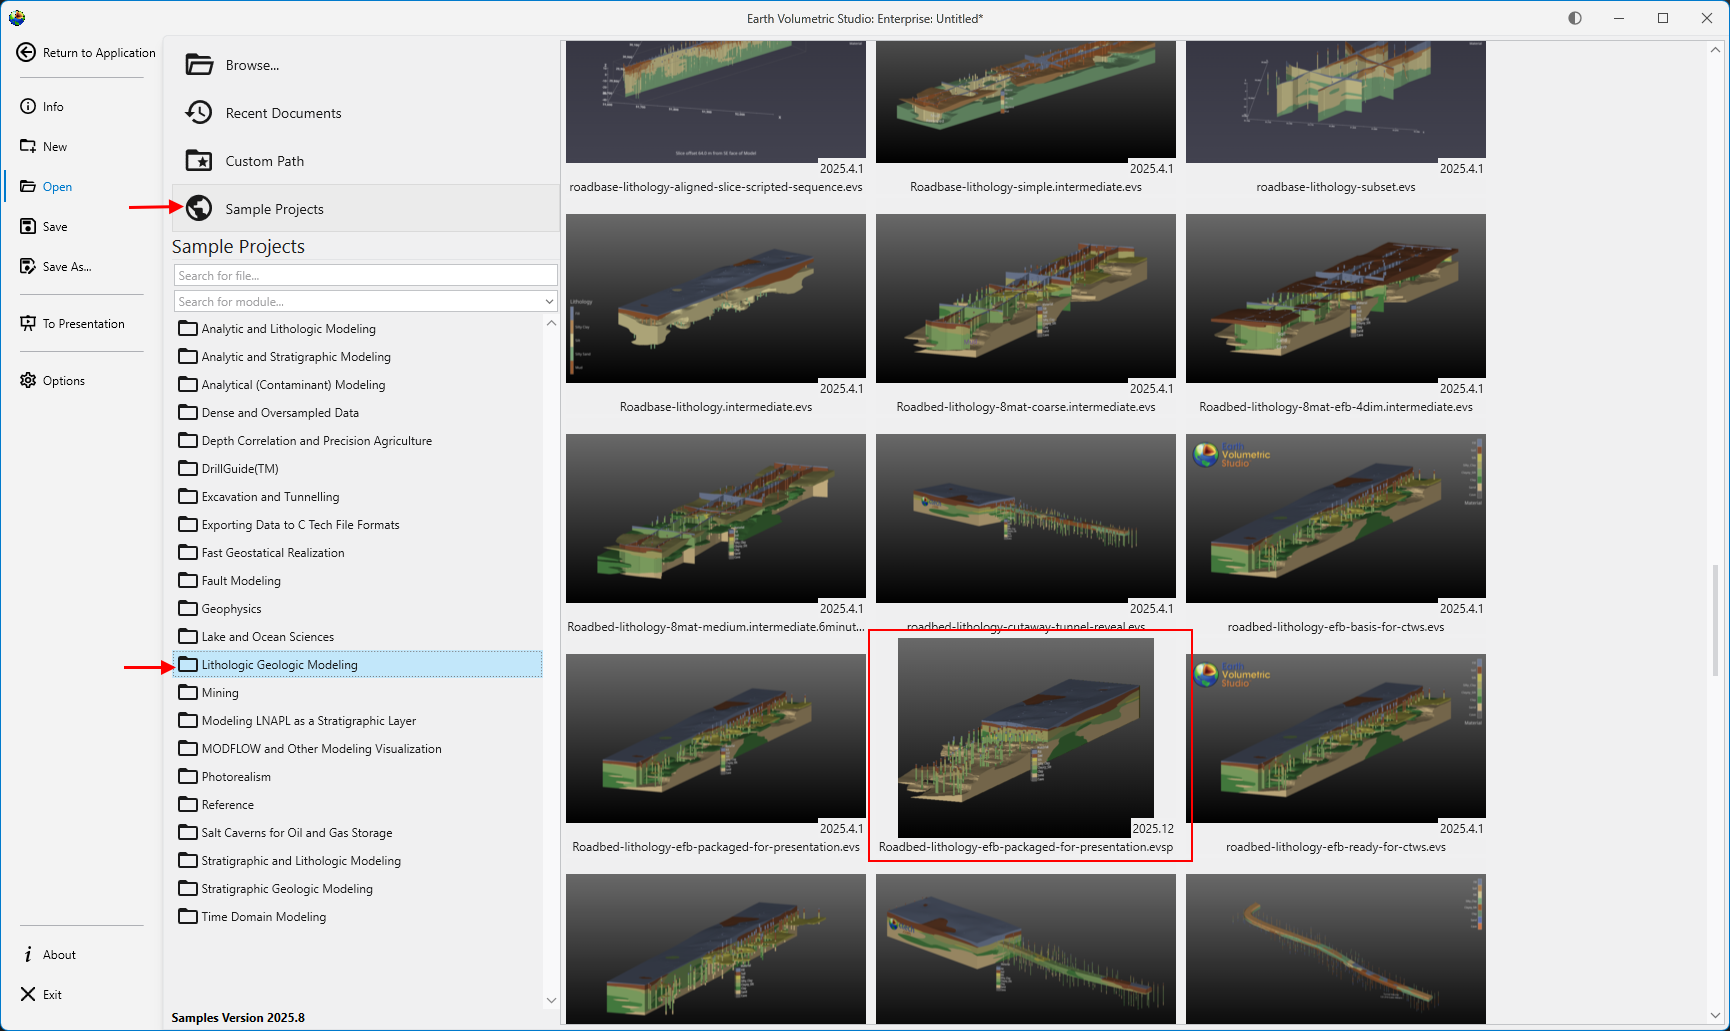
Install Earth Volumetric Studio Sample Projects (same link as above).
Note that any EVS license version can open EVSPs. You only need to choose the Presentation and Demo license option if you do not have an existing EVS license.
Opening an EVSP File
EVSP files can be large (often 10-50 MB or more) because they contain a complete 3D volumetric model. Once EVS is installed, you can open an EVSP file in a couple of ways:
Double-Click: Simply double-click the .evsp file in Windows Explorer to launch EVS and open the presentation.
**From EVS:**Start EVS and use the initial window to open your file.
Select the file from the Recent Files list.
Click Open an existing application to browse for your file.
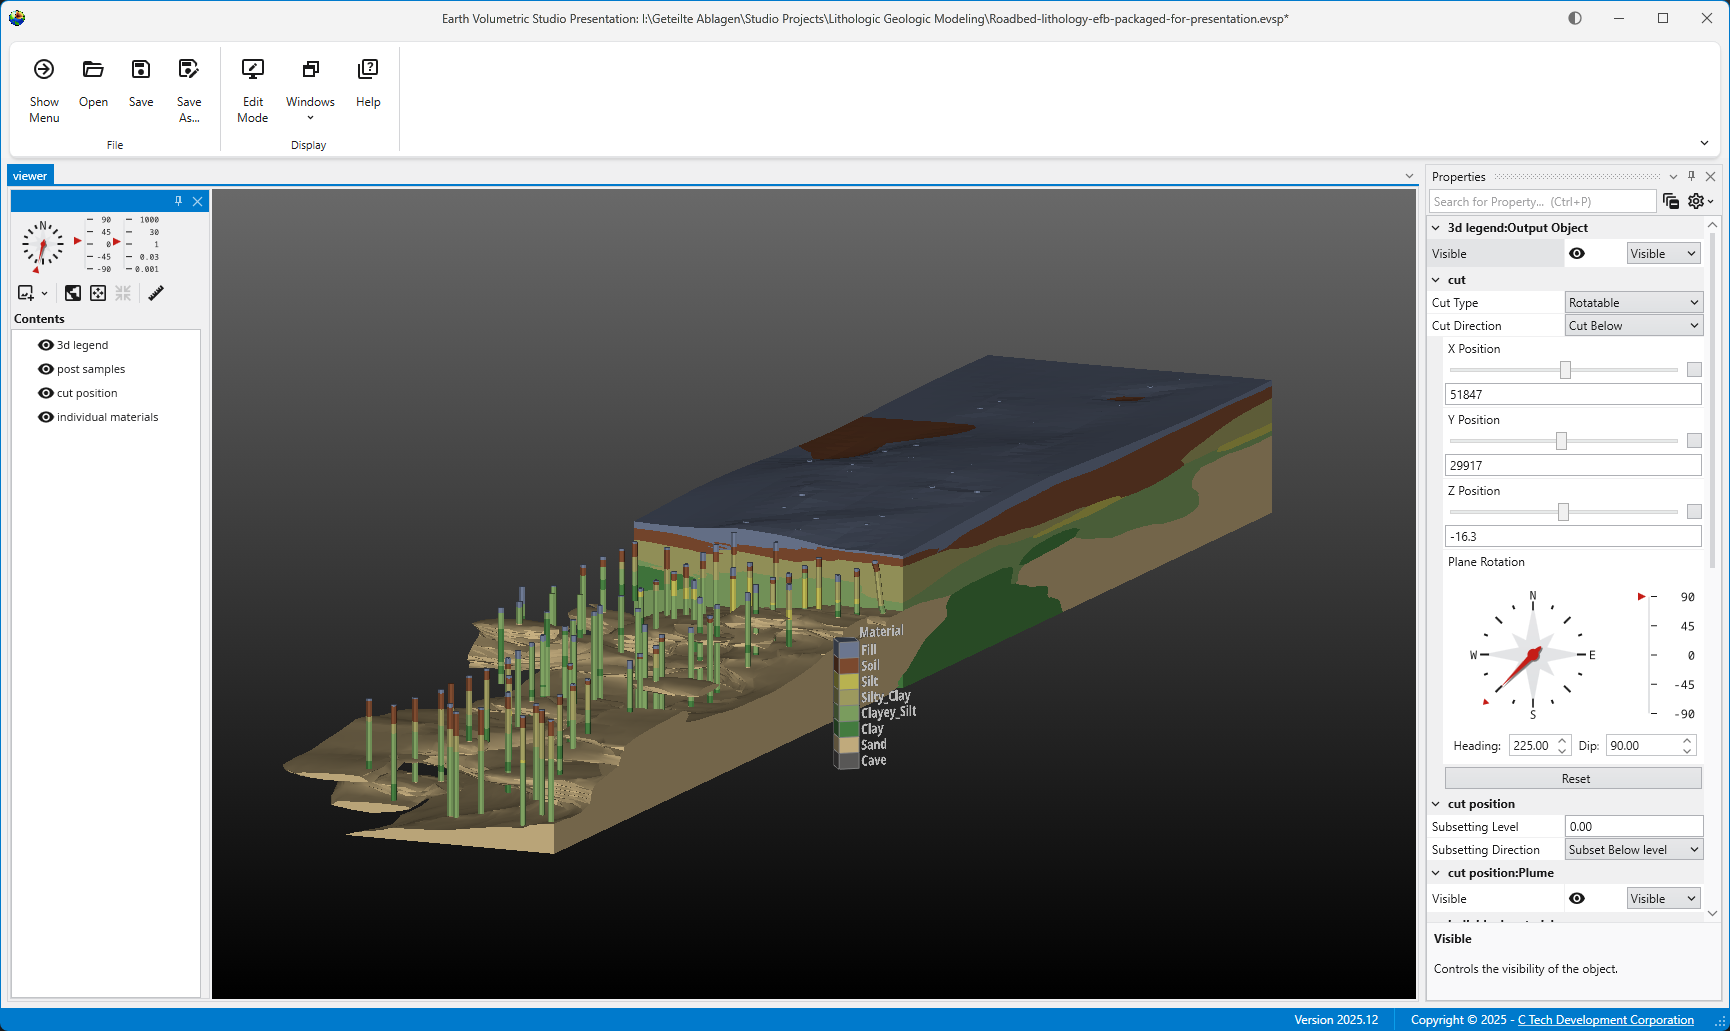
Understanding the Interface
When your file opens, you will see the EVS Presentation Application, which has three main components:
The Main Menu: Contains controls to manage windows and access this help guide.
The Viewer: The main window where you see and interact with the 3D model.
Application Properties: A panel with parameters you can adjust to modify the model.
Your primary focus will be on the Viewer and Application Properties.
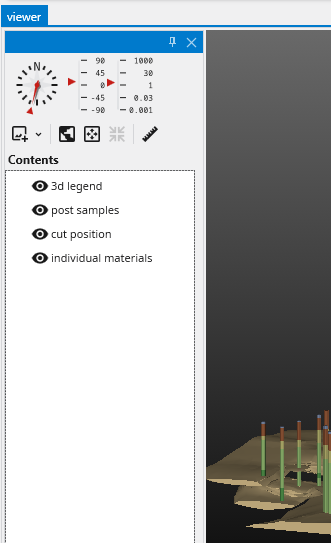
Interacting with the Viewer
The Viewer is your window into the 3D model. Basic controls include rotating, panning, and zooming.
For a complete guide on navigation, see the Mouse Interactions topic. Also see the Viewer help topic.
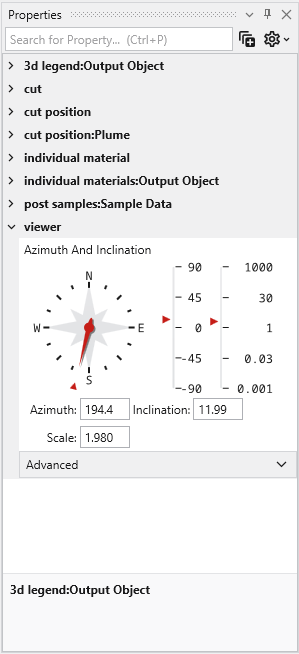
The viewer contains view direction and other tools for quick access:
View Controls:
Azimuth and Inclination: Use the dial and sliders to set a specific camera angle.
Top: Resets the model to a top-down view.
Fit: Resizes the model to fit entirely within the Viewer window.
Center: Sets the center of rotation. To use it, probe a point on an object (Ctrl+Left-Click), then click Center. The model will now rotate around that point.
Snapshot: Captures the current view and saves it as an image file (e.g., PNG, JPG). The output resolution is affected by the View Scale parameter if it is available in the Application Properties.
Measure Distance Tool:
Check the Measure Distance box to enable the tool.
Probe two points on the model using Ctrl+Left-Click.
The Information window will appear with the coordinates of both points and the calculated distances (X, Y, Z, and total).
The Application Properties panel contains all the interactive parameters set by the EVSP creator. This is where the power of EVSPs lies, offering nearly limitless ways to customize the view.
Parameters are organized into hierarchical groups based on the modules in the original EVS application. You can expand or collapse each group using the triangular button next to its name.
From the collapsed list above, we can see this application allows control over cuts, materials, the legend, sample postings (borings), and viewer properties.
Example: Modifying the Model
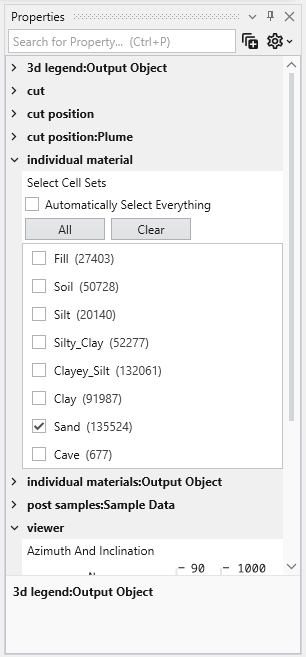
If we expand the individual material group, we see checkboxes for each geologic material in the model.
Initially, only “Sand” is selected. By checking other boxes, we can display multiple materials simultaneously.
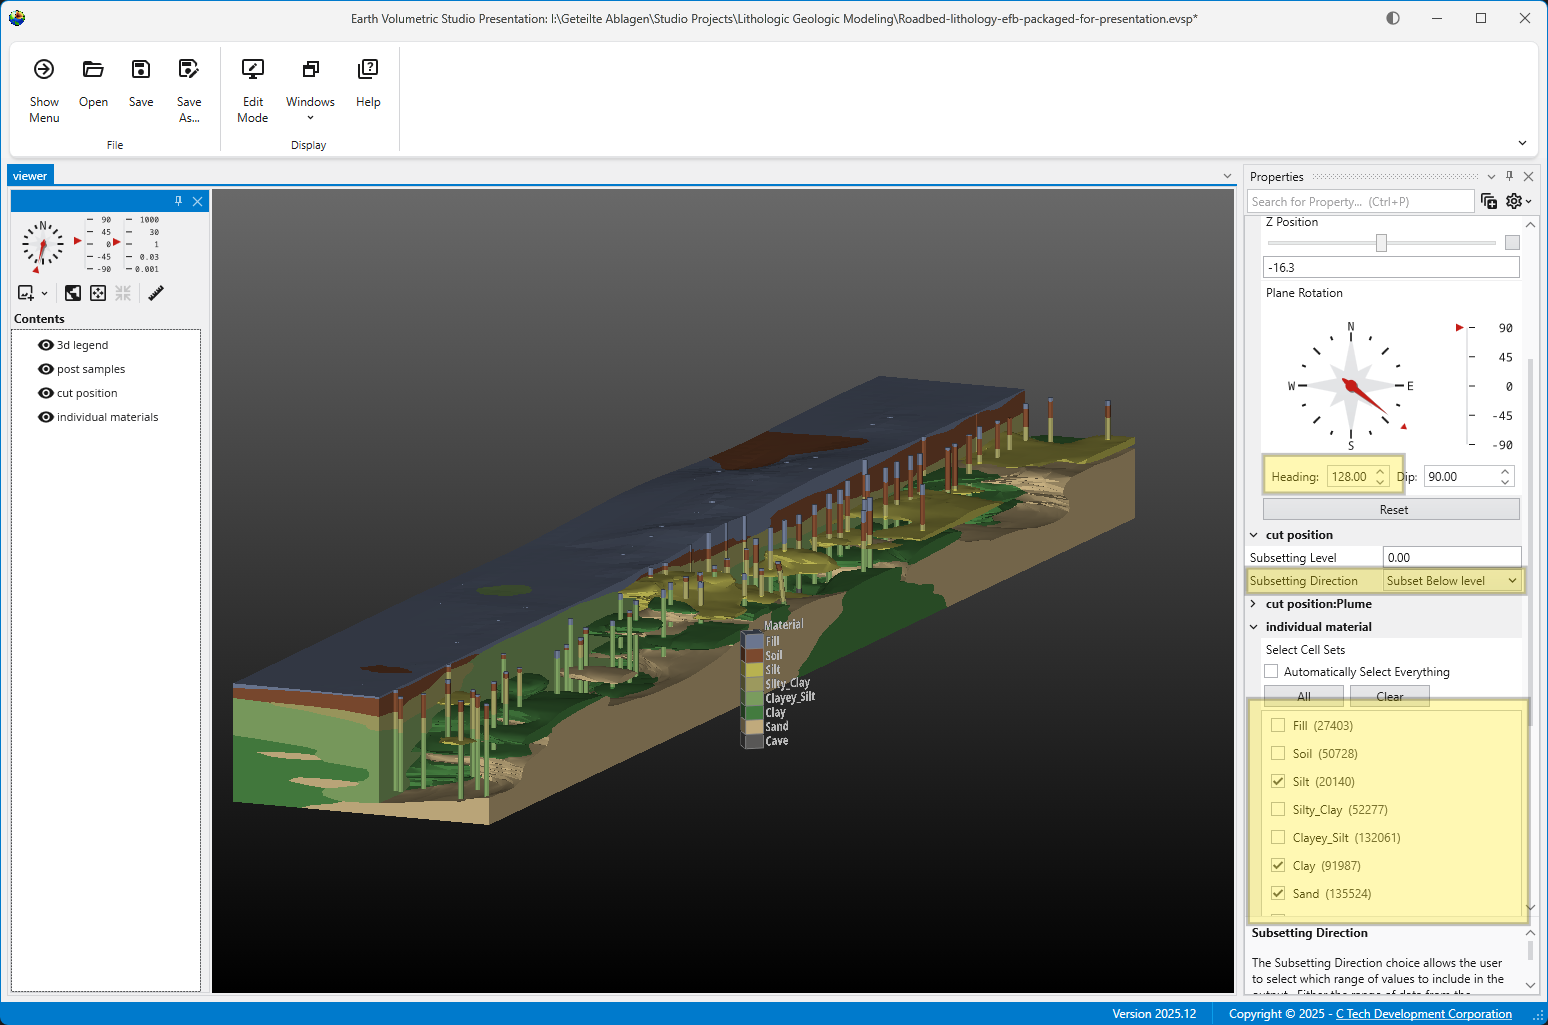
By adjusting a few parameters - such as material visibility, cut plane angle, and cut position - we can create a dramatically different output.
The ability to combine changes across different parameters is what makes EVSPs so powerful. Even a simple presentation can offer a staggering number of possible views, allowing for in-depth exploration of the underlying data.
The development of EVS Presentations (EVSP) from EVS Applications will nearly always require modification to your EVS application. The key steps are:
Save your application (ideally under a new name, as you will be modifying it for the process of making an EVSP).
Replace Disallowed Moduleswith acceptable replacements, if applicable.
Note: Not all Disallowed Modules have replacements which can be included in EVS Presentations. For example, many 3d exporters must just be removed altogether.
Modules which create a model (gridding and horizons, 3d estimation, etc) must be removed. This is done by saving an EF2 file (using write evs field) of their output, and then using that EF2 file in read evs field as a replacement of the network portion doing the model creation.
Packageall data files referenced in any modules.
There cannot be any externally referenced data files.
Some modules cannot be packaged and are automatically replaced by the packaging process. These include:
Add all desired module properties to Application Favorites, so they can be accessed once the application is saved as an EVS Presentation.
EVS Presentation files do not allow access to module properties unless they are added to the Application Favorites.
Backup your application as an EVS application to serve as an editable backup.
This is essential, should you wish to add additional module properties later.
Convert the application to an EVS Presentation (.evsp file).
This is not a reversible process, which is why you want the backup from step 5.
Convert To Presentation
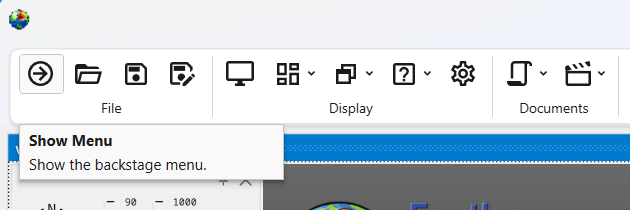
The option to convert your current application to an .EVSP file is not a reversable process. To access this, choose Show Menu in the Main Toolbar:
This will open the Menu. Choose To Presentation to convert to an EVS Presentation:
Disallowed Modules and Replacements
The following table lists all disallowed modules and their replacements if there are any. Some modules, primarily interactive modules (e.g. modify data 3d and create stratigraphic hierarchy) and export modules (e.g. export cad and export vector gis).
Disallowed Module
Category
Replacement
external kriging
Estimation
read evs field
2d estimation
Estimation
read evs field
3d estimation
Estimation
read evs field
scat to tri
Estimation
read evs field
scat to unif
Estimation
read evs field
modify data 3d
Estimation/editing
none
combine horizons
Geologic modeling
read evs field
edit horizons
Geologic modeling
read evs field
horizon ranking
Geologic modeling
read evs field
lithologic modeling
Geologic modeling
read evs field
gridding and horizons
Geologic modeling
read evs field
create stratigraphic hierarchy
Geologic modeling
none
material mapping
Geologic modeling
read evs field
drill path
Geometry
none
analytical realization
Geostatistics
read evs field
lithologic realization
Geostatistics
read evs field
stratigraphic realization
Geostatistics
read evs field
well decommission
Geostatistics
none
read geometry
Import
read evs field
export horizon to raster
Export
none
export horizons to vistas
Export
none
export georeferenced image
Export
none
write evs_field
Export
none
export web scene
Export
none
export pdf scene
Export
none
export 3d scene
Export
none
export vector gis
Export
none
export cad
Export
none
export nodes
Export
none
write_lines
Export
none
cell_computation
Python
(Enterprise License Only)
read evs field
(for Floating Licenses)
node_computation
Python
(Enterprise License Only)
read evs field
(for Floating Licenses)
trigger_script
Python
(Enterprise License Only)
none
(for Floating Licenses)
Restricted Functions:
In addition to the disallowed modules, certain integrated functions are restricted such as:
Writing 3D Scene files (for C Tech Web Scenes, 3D PDFs, etc)
Animator (creation of bitmap animations such as .MP4 files)
Tools Tab: All functions
Open Python Script
Enterprise License customers may package Python scripts using the trigger_script module
EVSP Outputs:
The EVSP itself is intended to be the primary output, therefore the ability to create any outputs while and end-user works with an EVSP is limited to bitmap images. End-users will not be able to write any 3D type outputs (CTWS, GLB, Shapefiles, CAD files, etc.).