C Tech’s EVS Presentations (EVSP) are single-file deliverables that allow you to share interactive versions of your Earth Volumetric Studio (EVS) applications. Your clients can use these presentations to modify properties and explore the model without needing a full EVS license.
For example, an EVS Presentation can allow your clients to:
- Choose their own plume levels
- Change Z-Scale and/or Explode distance
- Move slices or cuts through the model
- Draw their own paths for cross-sections
While the content of each EVSP will vary, this guide covers the fundamental features common to all EVS Presentation applications.
Getting Started: Prerequisites
Before you begin, please ensure the following:
- Verify your computer hardware meets the minimum requirements.
- Install Earth Volumetric Studio.
- Download the latest version here.
- Follow the installation instructions.
- Install Earth Volumetric Studio Sample Projects (same link as above).
- Note that any EVS license version can open EVSPs. You only need to choose the Presentation and Demo license option if you do not have an existing EVS license.
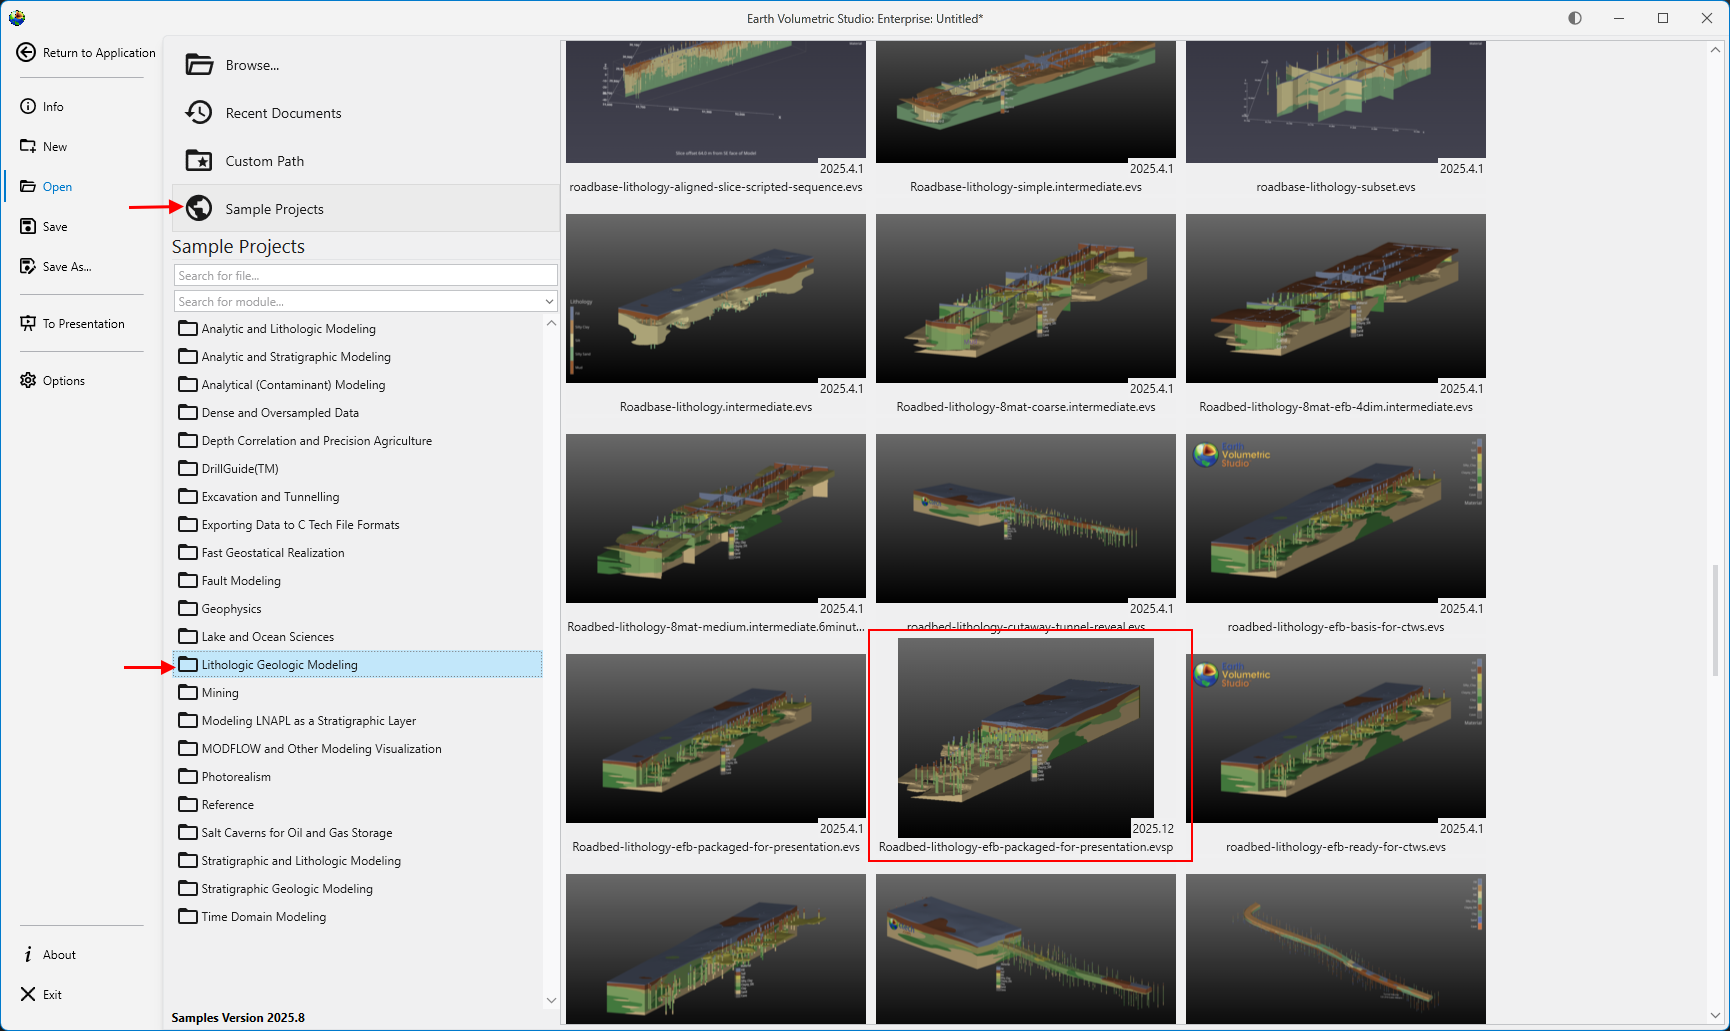
Opening an EVSP File
EVSP files can be large (often 10-50 MB or more) because they contain a complete 3D volumetric model. Once EVS is installed, you can open an EVSP file in a couple of ways:
- Double-Click: Simply double-click the
.evspfile in Windows Explorer to launch EVS and open the presentation. - **From EVS:**Start EVS and use the initial window to open your file.
- Select the file from the Recent Files list.
- Click Open an existing application to browse for your file.
Understanding the Interface
When your file opens, you will see the EVS Presentation Application, which has three main components:
- The Main Menu: Contains controls to manage windows and access this help guide.
- The Viewer: The main window where you see and interact with the 3D model.
- Application Properties: A panel with parameters you can adjust to modify the model.
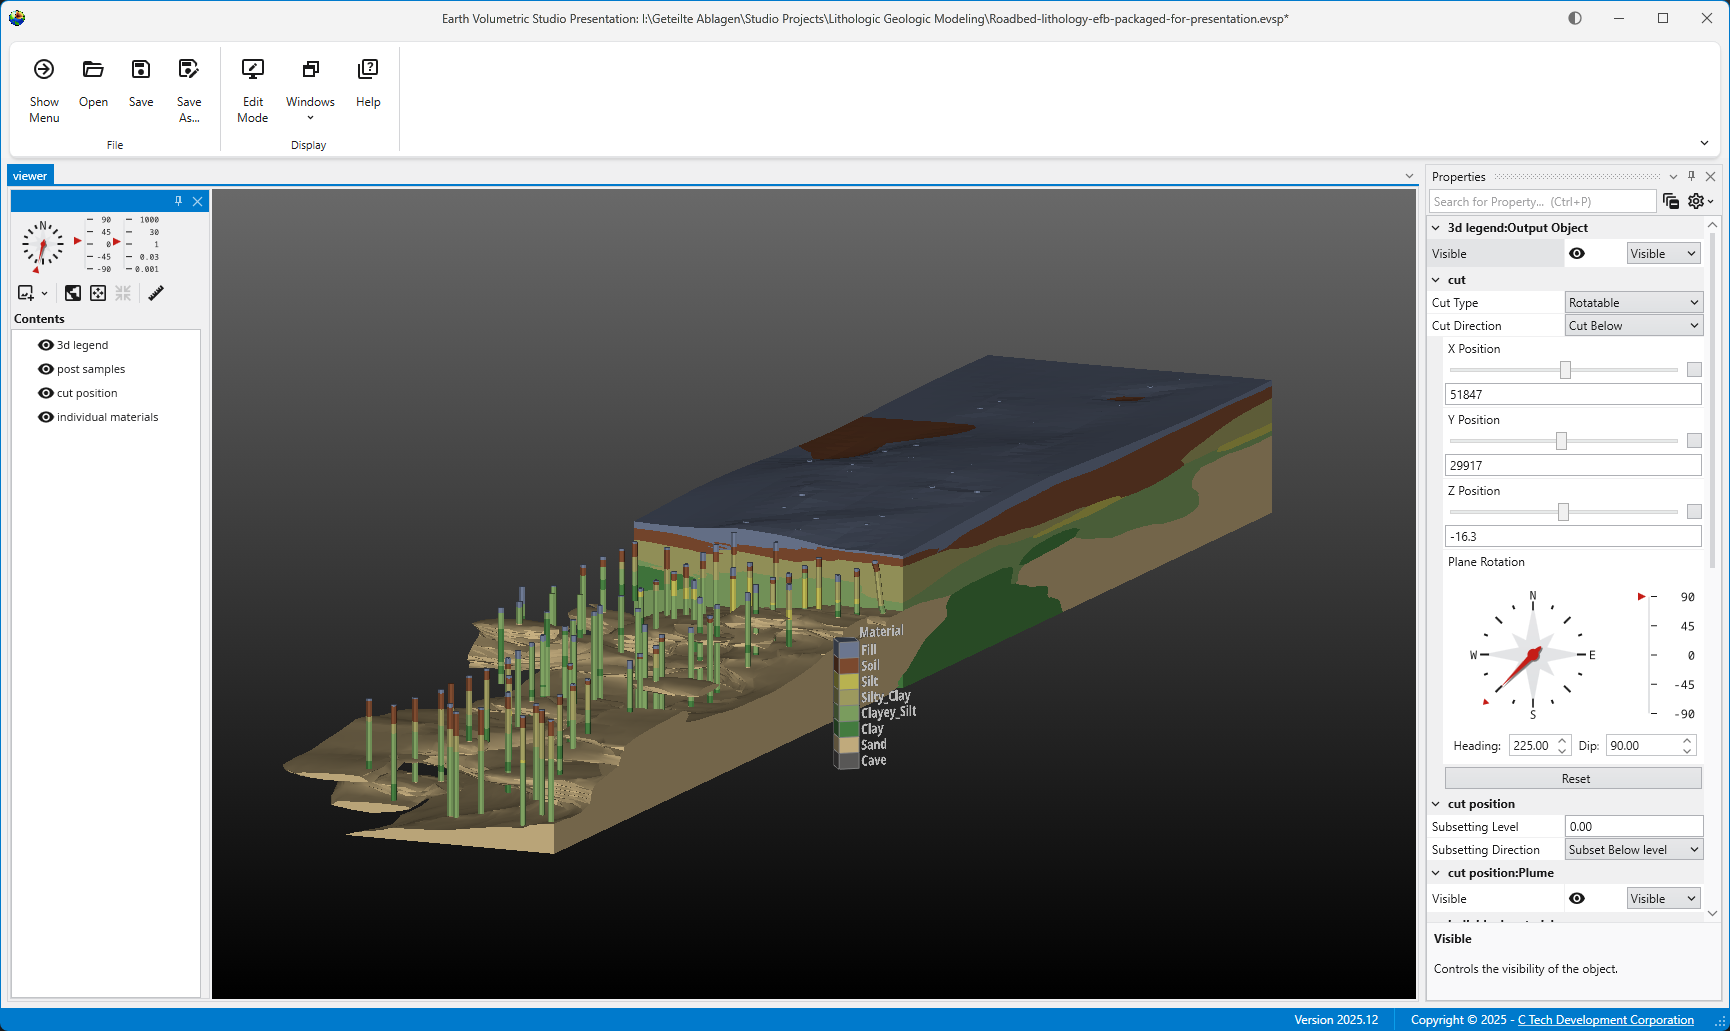
Your primary focus will be on the Viewer and Application Properties.
Interacting with the Viewer
The Viewer is your window into the 3D model. Basic controls include rotating, panning, and zooming. For a complete guide on navigation, see the Mouse Interactions topic. Also see the Viewer help topic.
The viewer contains view direction and other tools for quick access:
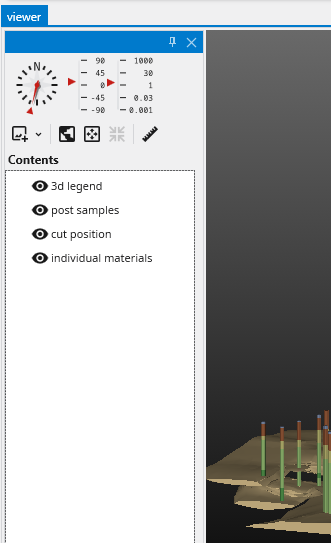
- View Controls:
- Azimuth and Inclination: Use the dial and sliders to set a specific camera angle.
- Top: Resets the model to a top-down view.
- Fit: Resizes the model to fit entirely within the Viewer window.
- Center: Sets the center of rotation. To use it, probe a point on an object (Ctrl+Left-Click), then click Center. The model will now rotate around that point.
- Snapshot: Captures the current view and saves it as an image file (e.g., PNG, JPG). The output resolution is affected by the View Scale parameter if it is available in the Application Properties.
- Measure Distance Tool:
- Check the Measure Distance box to enable the tool.
- Probe two points on the model using Ctrl+Left-Click.
- The Information window will appear with the coordinates of both points and the calculated distances (X, Y, Z, and total).
See the Viewer Features topic for more information.
Using Application Properties
The Application Properties panel contains all the interactive parameters set by the EVSP creator. This is where the power of EVSPs lies, offering nearly limitless ways to customize the view.
Parameters are organized into hierarchical groups based on the modules in the original EVS application. You can expand or collapse each group using the triangular button next to its name.
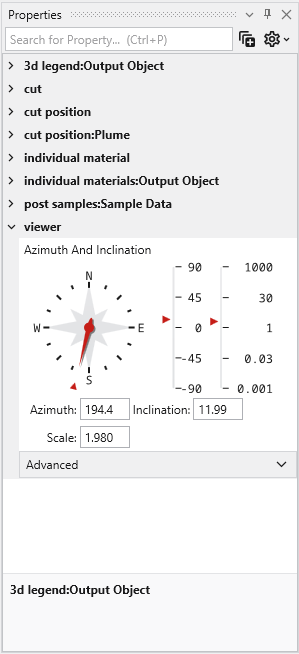
From the collapsed list above, we can see this application allows control over cuts, materials, the legend, sample postings (borings), and viewer properties.
Example: Modifying the Model
If we expand the individual material group, we see checkboxes for each geologic material in the model.
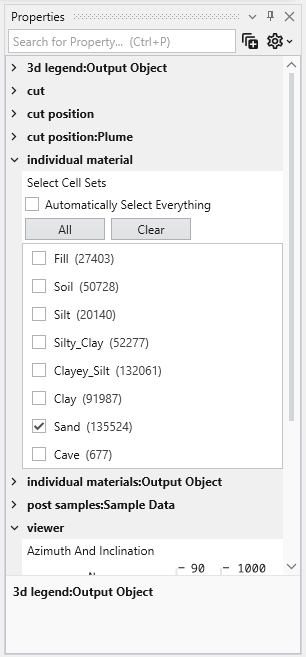
Initially, only “Sand” is selected. By checking other boxes, we can display multiple materials simultaneously.
By adjusting a few parameters - such as material visibility, cut plane angle, and cut position - we can create a dramatically different output.
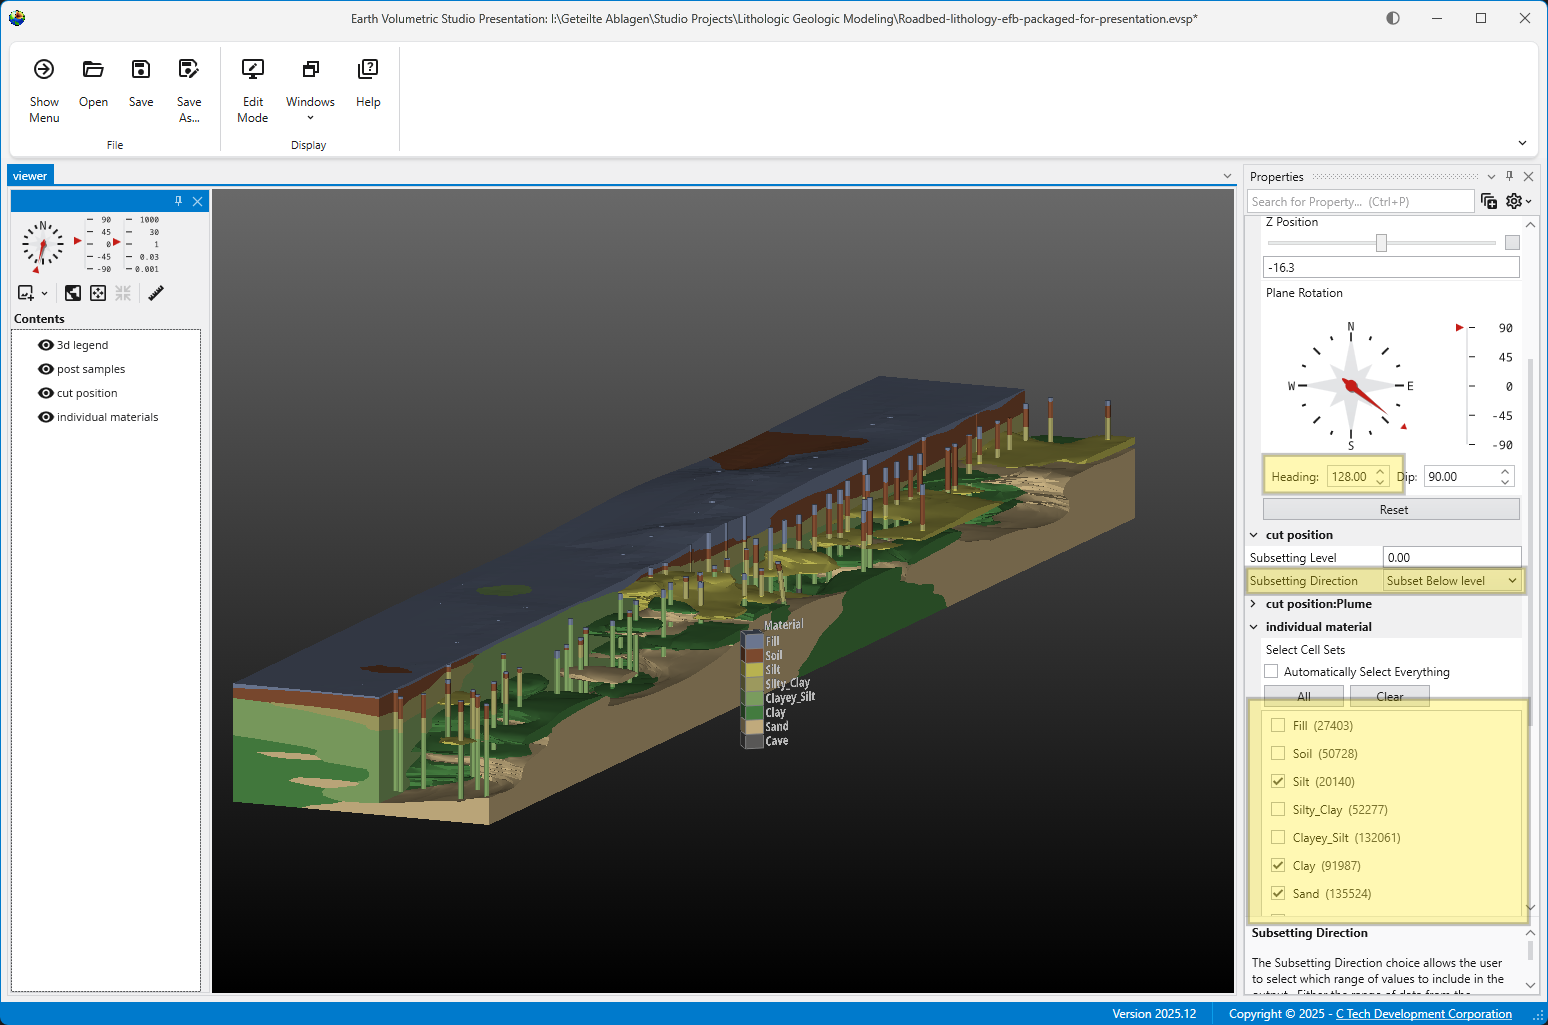
The ability to combine changes across different parameters is what makes EVSPs so powerful. Even a simple presentation can offer a staggering number of possible views, allowing for in-depth exploration of the underlying data.